Beginner's Guide to Backcountry Backpacking

As the human population continues to grow and urban centers become increasingly crowded, many people are turning to the outdoors as an escape from the city and from other people. Understandably so - time in nature has long been lauded as a way to be more physically, spiritually, and emotionally healthy. Personally I know that I’m happiest when I’m outside, and try to get out as often as I can.
Backpacking is naturally the next step that a participant to outdoor activities might want to take after they have experience day hiking. Taking an overnight trip is an exciting way to test your skills as a natural being and is the best way to gain the solitude that is so hard to come by in our modern age. It’s also a great way to get in touch with your roots and live life like our ancestors did, with everything you need to survive carried on your back.
It’s easier than you might think to head out for an overnight backpacking trip. An overnighter doesn’t necessarily have to be a 20 mile, super challenging hike through the mountains - you can even just head out a few hundred feet for your first overnight trip. In fact, if you’re at all nervous about the prospect of spending a night in the wilderness away from the comforts of civilization, this is a great way to get your feet wet! The best teacher is experience - the more trips you take, the more you’ll learn, and the more you’ll feel comfortable with sleeping out under the stars.
Taking your first overnight trip can seem daunting - there are things you need to know and gear you might want to have to be sure you have a safe, enjoyable experience. Whether you’re planning your first single or multi-day backpacking trip or you have a few trips under your belt and you’re looking to gain more information, you’ve come to the right place!
Table of Contents
Beginner’s guide to backpacking at a glance
Leave No Trace!
Don’t get overambitious - stay close to home and choose an easy destination for your first trip.
Go with an experienced friend or group of friends your first time.
Check the weather before you head out and plan accordingly.
Plan your meals and water access carefully.
Collect your essential gear, but don’t go crazy right away - borrow what you can, and wait to invest in expensive equipment until you know exactly what you want.
Respect wildlife, and understand if you’re heading to an area that requires special wildlife considerations like Grizzly country.
Make sure you’re in adequate physical shape for the route you choose.
Leave No Trace
We start with Leave No Trace because to me, the most important thing that a new backpacker can learn is how to respect the environment. We are guests in these beautiful places, and the number one rule of being a guest somewhere is leaving things better than you found them. This isn’t exactly possible for humans to do when visiting nature, but by educating yourself on how to camp and hike responsibly, you can make a conscious effort to ensure that the next person to come to that special place will be able to enjoy it as much as you are.
When you step into nature, try to be considerate of others. If it were your first time exploring a dream destination or even the state park closest to where you live, what would you want to experience? We should go into each trip with the mentality of leaving the place we are visiting better than we found it.
The seven principles of leave no trace can be reviewed here: https://lnt.org/why/7-principles/
Take some time to get to know these by heart. Eventually, you’ll follow these principles as if they are second nature. When you first start studying LNT, some of the principles may seem nit-picky, but when you start to dig in deeper, investigating more with works like NOLS Wilderness Ethics, you see that even the smallest actions can make a huge impact on wild places. Cutting switchbacks, camping on wildflowers, or dumping soapy water into a lake can cause damage that can take thousands of years to be repaired. Knowing how your actions impact these places can help you understand how you can best minimize that impact.
Going to the bathroom in the backcountry
This is a topic that deserves its own section. Going number two on your backpacking trips can be glorious - I’ve had some spectacular views that I will never forget while I took care of business. However, just like many things, if you aren’t prepared to head out on your own to relieve yourself while you’re backpacking, you could have a less than ideal time.
Put together a bathroom kit. Get two quart sized sealable baggies. In one bag stash your TP, and in the other empty bag, hand sanitizer, and a trowel. When it’s time to go, bring this kit with you.
Choose a location that is at least 200 feet away from any water sources, and at least 200 feet away from any campsite or trail. A dirt or sand patch relatively free of vegetation is ideal if you can find it. If you can find a fallen log to rest on or a tree to lean against, that’s always a great strategy.
Using your trowel, dig a hole around 6 inches deep, and 6 inches across. Do your business, and extract your fresh TP from the bag. Wipe, then place the used TP in the empty ziploc bag that was in your kit bag. Cover your feces with the dirt you had scooped out of the hole, wash your hands with the sanitizer, and replace all of your items in your main ziploc bag. Make sure you do not bury your TP no matter how tempting it is! You may think that TP is just paper, but it can take years to break down. There’s nothing worse than arriving in a location that you imagined would be pristine just to find piles of TP everywhere. Pack it out!
It might seem silly to devote so much attention to this topic, but if you’re not prepared, answering nature’s call in the backcountry can be less than pleasant. Not only that, but nobody wants to stumble upon the Mountain House that you wolfed down the night before.
Now that we’ve covered the basics of Leave No Trace, we can get into the fun part - planning your first backpacking trip!
Planning Your Route & Destination

Get a map and compass and learn how to use them.
Whether you’re setting out on your first or your fiftieth backpacking trip, planning is key. There are many things to consider when planning a destination and route - no matter how experienced you are, you’ll want to check all of the planning boxes before heading out.
Maximize time on the trail, minimize time in the car.
Go with an experienced friend or group of friends the first time.
Account for distance and elevation gain.
Research your route, the terrain, and identify campsites beforehand. Bring a map and compass.
Download your route and the surrounding areas on your phone so you can access them offline.
Check local rules and regulations, and see if you need to obtain a permit before setting out.
Consider leaving the kids and the dog at home your first time out.
Share your itinerary with a few loved ones or friends, and let them know when they should expect to hear from you.
On your first (or first few) trips, I recommend keeping your destination close to home and not planning anything too extremely challenging. Staying close to home is a good recommendation no matter your level - you aren’t setting out to spend your time locked away in your car! The less time you spend driving, the more time you get to spend out on the trail. You also want to make sure you arrive with plenty of time to get to your first campsite and setup your camp - pitching a tent in the dead of night is no fun. Trust me.
First and foremost backpacking is meant to be enjoyed, so don’t feel any pressure to tackle crazy distances for your trip. Even as a seasoned backpacker I find that 10 miles per day is my sweet spot. The max I would recommend is 15 miles. There’s a point where it stops being fun and you just want to get to camp - the key is to find where that intersection is for you, and planning your trips around that ideal distance.
Be sure to take in elevation gain and loss when you’re planning your route. A distance of 5 miles may seem paltry, but if you have 2,000 feet of elevation gain, it could take you all day! Consult a map before departing, and bring your map with you. I love to use an app like Gaia GPS or Hiking Project to calculate distance and elevation. You can also use these apps along with your phone’s GPS to determine how far you’ve gone, how far you have to go, and determine your location. Keep your phone on airplane mode while you’re in the backcountry, and bring a portable battery to charge it.
Base camping is a great option for backpacking trips. Base camping is where you hike all of your gear, setup camp at a spot that provides easy access to other locations or objectives, and daytrip to different locations during your time there. This is an awesome way to cover lots of ground without having to carry all of your gear along with you or break down camp every day.
An extremely important item that many people tend to overlook is informing a loved one or friend of your itinerary and letting them know when they should expect to hear from you after your trip. I’ll never forgot one trip I took to the Boundary Waters - four of us went, and at one point we all figured out that none of us had told anybody where we were going. We had all thought that one of the other three would do so. None of us ever made that mistake again!
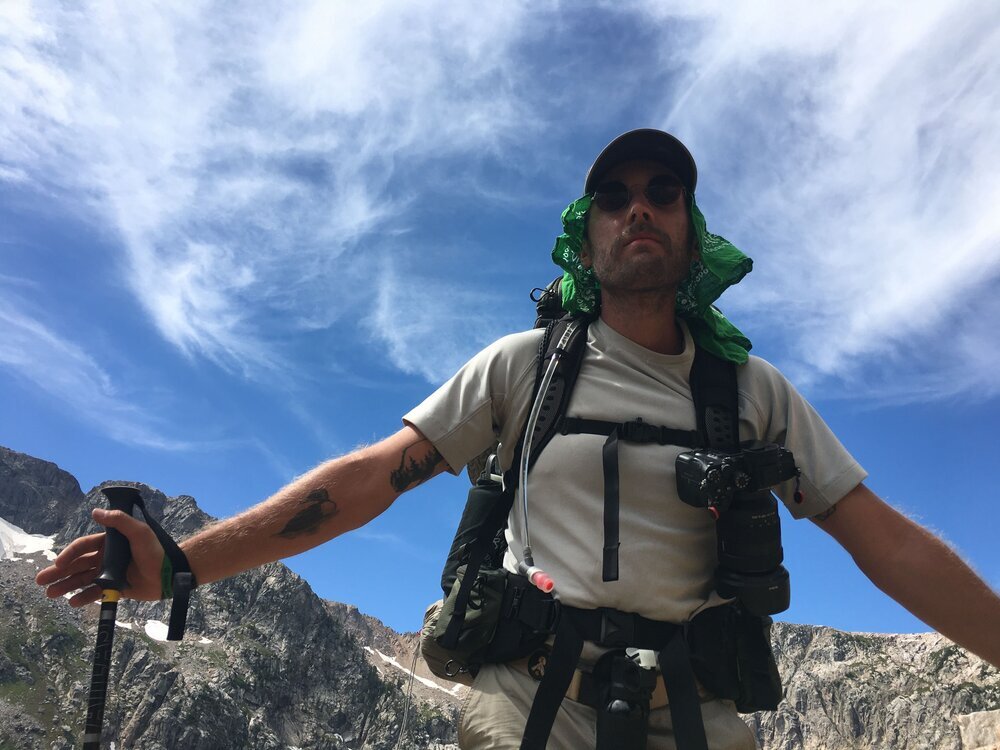
Backpacking Gear
Ahhh, gear. For the most part I try to keep my material possessions to a minimum - gear is the only place where I’ve failed at that mission. Learning about, buying, testing, and upgrading your gear is definitely an exciting part of backpacking!

Gear overload.
However, I would recommend resisting this temptation at first. Even if you know you’ll love backpacking, it’s a good idea to start small and cheap first. Scrounge garage sales, borrow gear from friends, make your own equipment. No matter what you do, your first time out you’ll forget or be missing pieces of gear. It’s unavoidable. If you go with a friend who has been backpacking for a while, you’ll probably drool over their upgraded equipment. Each trip you take will likely add one or two items to your backpacking shopping list. Going with friends can be a great way to test out their equipment, see exactly what it is you want to go with, and add it to your collection once you’re ready. If you head out and stock up on fancy new equipment right off the bat, it’s almost certain that you’ll wind up spending more money buying items twice. I know from experience!
That being said, there are a few items that I would highly recommend investing in at a premium right away. These are things that can truly make or break your trip, and even determine whether or not you enjoy backpacking as a lifelong activity. There are lots of good options out there and you really can’t go wrong with pretty much any of them. I’ve included links to the gear I use so you can start with a reference point.
Backpack - Osprey Aether AG
Hiking Boots / Shoes - Salomon 4D GTX
Sleeping Pad - Nemo Foam Pad or Big Agnes Core Inflating Pad
Sleeping Bag - Kelty Cosmic Down
Head to your local outfitter and don’t be afraid to invest in these critical pieces of gear. Besides the backpack, they all can be used outside of backpacking, and if you buy smart, you’ll use them for decades to come.
For everything else, start cheap (or free!) and work your way up. Check out our backcountry backpacking checklist for a complete list of gear you’ll want to consider bringing before you hit the trail.
Another piece of important advice is get to know your gear before you are in the backcountry. If you get a new stove, head outside in your backyard and fire it up a few times. Break in your new hiking boots and backpack. You don’t want to be the one who goes hungry or gets bit by mosquitos because you can’t figure out your stove or you bought the wrong bug net!
How to Pack Your Bag
It took me several trips to dial in the way I load my pack, and depending on the terrain, weather, or other factors it can differ with every trip. The basics of loading your pack generally don’t change - the below information goes into detail on how I usually pack for a standard wilderness trip.
One important thing to keep in mind as you load up your pack is balance. You don’t want to have 20 pounds on your right side and 5 on your left - make sure you do your best to load things evenly and center the items that are big enough to stretch across your pack.
Bottom of pack - I always like to put my sleeping bag, sleeping pad, and other items that I won’t need until we get to camp in the bottom of the pack. I’ll also sometimes throw my down jacket or another bulky item in the bottom - the idea is that ideally you won’t need this stuff until you get to camp for the night. The bottom pouch also provides a nice foundation to build on as you get to the heavier items in your bag.
Core of pack - This is where you’ll want to throw your heaviest items as wells as things you won’t need until you get to camp. This includes cooking equipment, tent, fuel, spare clothing, etc. In between the items at the core of your pack and the very top of your pack I like to insert my food - it’s the heaviest item, but it’s important to keep the food separate from your sleeping equipment to avoid attracting wildlife to your tent at night. I also insert my water bladder into my bag before loading up so I can easily sip from it while hiking throughout the day.
Top of pack - On top of my pack I throw things that I might need throughout the day - snacks, photography equipment, extra layers, water filter, etc.
Top pockets - Here you’ll also want to put things that need to be easily accessed through the day. First aid kit, snacks, buffs / bandanas, things of that nature.
Tool loops and clip ons - As I have gained experience I have generally done my best to keep everything in my bag for several reasons, but I’ve been known to clip an item or two on my bag using a carabiner. Usually this means that your bag is too full and you should re-evaluate your gear selection, but you’re bound to have some danglies every now and then. Good things to strap on the outside of your bag are your tent, sleeping pad, or camp shoes.
External holders - It’s likely you will have two water bottle holders on your pack. I use one for a water bottle, one for my camera’s tripod.
Stuff sacks, compression sacks, dry bags, and packing cubes - These are items that you’ll need to buy separately, but lots of times you can find them in bargain bins or on sale. My things seem to get everywhere when I backpack - organizers are critical to keeping your gear and your sanity in check.
Food & Garbage - Grab two larger Sea to Summit Dry Bags or something similar - one for food, one for trash. You can wash them when you’re done and reuse them.
Clothing - Grab a few packing cubes to help organize your clothes along with other gear. These are great for backpacking as well as any other type of travel.
Cameras and electronics - It’s imperative that you store all of your electronic gear in a dry bag - again, I recommend the Sea to Summit Dry Bags.
Food Planning
After you’ve chosen your destination, route, and determined how many days you’ll be backpacking for, you can start planning out what you will eat on your trip.
Food can be one of the hardest things to dial in when backpacking. It can seem simple at first - just stock up on dehydrated food, candy bars, trail mix, and so on. Eating the same dried food for a week can get old, and when you eat mac and cheese for the fifth time on a trip, you’ll be ready for a fresh meal and an ice cold beer. If you get creative and are willing to put in a little extra work, however, you can eat just as good on the trail as you do at home - and do it at a fraction of the cost and the weight.
Remember that your cooking supplies will be limited, and you’ll have to clean all of the dishes you use right after your meal - likely you’ll need to use them again for your next meal. Keep things simple and your meals will be much more enjoyable. Don’t forget - pack it in, pack it out! The less packaging you bring, the less weight you’ll carry and the less space your food will take up.
If you visit any outdoor outfitter you’ll see a plethora of dehydrated meals lining the shelves in the camp kitchen section. I have a love / hate relationship with dehydrated meals, leaning strongly towards the hate side of the relationship. Most of the dehydrated meals are incredibly high in sodium and other unhealthy ingredients, and more often than not they taste like salty mush.
There are some solid dehydrated options like Patagonia Provisions and MaryJane’s Outpost meals, but for less money and minimal effort you can create your own delicious backpacking meals. This is the route I would recommend taking once you’re ready for it!
One tip that can make the difference between going hungry and having a full belly on your final night is packing one more meal than you think you might need. It adds weight, but if you wind up running low on food or get into a situation where you have to stay out longer than expected, that extra meal could quite possibly be a lifesaver.
Kitchen Equipment

To start, you’ll need to get your basic kitchen equipment together. At the very least, you’ll need a stove, a pot to cook and boil water in, a dish, silverware, and a mug. I like to have one cooking apparatus that is only used to boil water and one that I use to cook in - this helps keep the water vessel clean and the water that is boiled in it taste free.
Your kitchen equipment will also depend on what you plan to cook while you’re backpacking. Only bring the equipment you absolutely need to save on space and weight! I’ve added some recommendations here so you can start with a solid reference point and continue your gear research on your own from there.
Backpacking Stove - MSR PocketRocket
Mug - Thrift store!
Dish - Thrift this as well - something versatile like a wide bowl is great.
Silverware - Any old spoon, fork, spork, etc will work.
Cooking Pot (Optional) - You can certainly get by with any old pot from the thrift store, but eventually it’s great to upgrade to something like the Sea to Summit X Pot.
JetBoil or Cooking Mug (Optional) - I do love my JetBoil for boiling water to make coffee, tea, or dehydrated meals, but you can also use your stove with something like the GSI Mug to boil water and save on space.
Breakfast
For me, oatmeal is my go to for breakfast. I’m a big fan of the prepacked paper bags of oatmeal - you can pour boiling water right into them and keep all of your dishes clean. Some dried fruit and nuts on the side, and you’ll be fed and ready to head out in less than 15 minutes.
Another option is to have a granola bar or two along with some dried fruit. It’s nice to keep it simple with minimal cooking so you can get on the trail as quickly as possible.

Lunch
There’s nothing more satisfying than taking a break midday at some amazing vista to wolf down a simple, delicious lunch. You’ll have a good chunk of your day behind you and a solid portion ahead, so it’s extremely important to refuel your body with protein, carbs, and of course plenty of water. Hydration mixes work great for a midday fuel up as well!
Some of my favorite lunch meals are cheese and crackers (salami optional), PB&J tortilla wraps (delicious, but can be messy), or even a simple meal of fruit and nuts. love to have a more intricate meal planned for the first day or two of lunch like tacos, nachos, or sandwiches, and then move onto simpler, non perishable lunches for the rest of the trip.
Dinner
After a full day of carrying your pack across mountains, forests, and streams, your body needs to refuel. Dinner is an extremely important meal and when you’re preparing dinners for your trip it should be treated as such.
When you’re first getting started it’s not terrible to bring along some dehydrated meals. They are quick and easy and if you go with one of the options we had recommended earlier - Patagonia or Mary Janes Outpost meals - they aren’t terribly unhealthy. They can be great sources of inspiration for when the time comes to create your own dinners.

Whole wheat pasta is a go to for backpacking meals. It doesn’t go bad, it’s healthy and it’s quick to cook. Pack some spices, dehydrated veggies, and salami and you’ve got yourself a tasty gourmet backcountry meal. Other dehydrated goods like beans, rice, quinoa, etc are also great options. Don’t forget a Snickers bar for dessert!
Just like with lunch, depending on the length of the trip, our destination, weather, and other factors I might pack in some fresh meat and bread for sandwiches or brats and buns for the first night only. After that, it’s all dehydrated.
Depending on where you are, you might even be able to supply your own dinner from time to time. If you have fishing skills this can be a great way to add a fun component to your trip, add some protein to your diet, not to mention get a taste of some of the freshest fish you’ll find anywhere.
Snacks
Having delicious snacks can make or break your trip. If all of your friends are snacking on breaks, you’ll be extremely jealous, and worse, hangry. Jerky, nuts, cheese, hydration gels, bars, granola, and dried fruits are just a few of my favorite snack options.
Sample meal plan
Before heading out I always like to write out all of my meals for the entire trip to ensure I pack everything I need. Here is a very simple sample meal plan for a five day trip that you can use as a template to build your own:
Wildlife and Food
When I mention wildlife and food, most people’s first thought is probably bears, mountain lions, wolverines, and other big game. While the consequences of attracting one of these animals should always be taken into consideration when handling your food, you’re much more likely to encounter the little fellas - mice, rats, squirrels, or ants. Wherever you are backpacking, observe the following guidelines to avoid unwanted interactions between your food and the local fauna:
Whenever possible keep your food in a separate dry bag or ziploc baggie during your hike. Only keep out the snacks you will need for short breaks, and pack up everything else. I’ve seen many a mouse chew right through a backpack pocket to get to a Clif bar!
When packing your bag, don’t store your food near your sleeping gear. The sense of smell of pretty much all animals is insanely sensitive, and having even the slightest scent on your sleeping bag or pad can attract critters.
Hang your food with a bag even if there are no bears in the area. I’ve never had a bear get into my food, but have seen tons of mice or raccoons try to pilfer a morsel during the night.
Have a separate bag for garbage, and follow the same guidelines as you do with the foodstuff.
Water Safety
Depending on your destination and the time of year, water can be a second thought, or the main consideration of your trip. You’ll either need to have access to water regularly on your route, or pack all of your water in. Plan carefully, ask rangers if possible, and always have a contingency plan.
Before heading out, make sure you know how to use your water filter like a pro. Gravity filters are spendy but are worth the investment, especially if you’ll be traveling with a larger group. I would also recommend that every member of the party carry a Lifestraw or something similar with them. Water filters can get clogged and people can get separated from the group - it doesn’t hurt to be prepared.
Unless you are 100% certain that the water is clean, never drink unfiltered water. If you’re high up in the mountains the chances are good that it’s pure, but there could be dog or goat shit that was frozen under the snow all season and melted just in time for you to take a sip from the pure mountain stream. It’s not worth risking getting Giardia in the middle of nowhere. Use your filter.
Wildlife Safety
If you do have any type of wildlife encounters while backpacking, there’s a 99.99% chance that it will be a positive or neutral interaction - generally local wildlife want nothing to do with humans, and we should go above and beyond to respect that. Oftentimes even the simple act of expending energy to flee from a person can push an animal into starvation territory, so the goal really should be to not have any animal interactions. However, you’re in the animal’s territory now, and chances are you’ll stumble upon some type of furry or scaly critter at some point.
The number one guideline for wildlife when exploring the outdoors is to leave them alone. Let them go about their business, and you go about yours - it’s as simple as that.
In the event that you do have an animal encounter that turns negative, it’s imperative to know how to handle it for your own safety and for the safety of the animal. This information is covered all over the internet and in National Park / Forest resources, so I’m going to link to many of these and allow you to do your own further research. REI has a nice article that covers most of the bases.
At a minimum, it’s good to know how by heart to handle the following types of animal encounters:
Grizzly & Black Bears
Mountain Lions
Moose
Bison
Snakes
First Aid and Participant Safety
Wilderness first aid and caring for an injured or sick individual goes far beyond the scope of this article. At the very least when you go out you should know CPR and how to at least triage any major health emergencies.
If you forget everything else, remember this - if someone gets hurt or sick in the backcountry, it’s not your job to treat them. It’s your job to make them as comfortable as they can while you or another member of your party seeks professional help. Call 911 if possible, or speed as fast as you can without putting yourself in harms way to the nearest ranger station.
I highly recommend taking a Wilderness First Aid Course through NOLS or some other qualified organization. For a relatively inexpensive amount you can learn skills that just might save your life or your best friend’s life. I’ve used these skills several times since taking the class, and I believe that even if you aren’t heading out to places where you might have to be the first responder, everyone should know basic first aid skills and what to do in an emergency.
Physical training
Depending on the difficulty of your route and your current state of physical fitness, you might be able to get by without changing or enhancing your exercise regimen. However, speaking from experience, backpacking is a lot more fun when you don’t feel like you’re about to keel over during the hardest part of the hike. I wrote an in depth guide on creating a workout routine specifically geared towards backpacking exercises:
Getting in Shape for Backpacking
One of the best things you can do is to fully pack your bag and hit your nearest hill. If you’re a flatlander, laps on the local ski hill can’t be beat!
Conclusion
You’ve taken the first steps towards getting out on your backpacking adventure - nice job! There are so many resources online and so many things you can read that will tell you all about how you should backpack, but the best way to learn is to just get out there! You’ll make mistakes, wish you had something you forgot - it’s all part of the process. As long as you have the critical items like food, water, shelter, and safety under wraps, you’re good to go. Backpacking isn’t about gear anyways, it’s about experiences in nature with the people you love. So what are you waiting for - get trekking!